123Solar is a logger app for photovoltaic inverter(s) and meterN is a metering and monitoring app for energy management, that can be used also for monitoring others meters like: water, gas, temperature, etc…
I’ve made a self-configuring Docker image to run both softwares, publicly available on GitHub and on Docker Hub repository, where you can find detailed information about the image.
In this little article I explain how to run the image on a Synology NAS.
Credits
Both 123Solar and meterN apps are developed by Jean-Marc Louviaux and are based on Web interfaces with PHP and shell scripts backend.
The SDM120C script used to read meter data via ModBus is developed by Gianfranco Di Prinzio.
Some of the interface scripts used to get data inside the Web apps are written and maintained by Flavio Anesi. Flavio has also published many very detailed and well done guides (in Italian) about the whole setup for these apps. Since these are the most detailed guides you find online about this topic, I suggest you read them.
Needed NAS packages
First of all, you have to install these packages:
- Docker
- Domoticz
Docker is available on official Synology repository.
Domoticz, otherwise, is available on jadahl.com
I suggest to download the last stable version. At the moment of writing: Domoticz Stable V4.9700 for DSM 6.2.
You don’n need the Python verion, just the Domoticz package.
Once downloaded, simply install on your Synology NAS using che Manual install function in Package Center.
You do not need to run the Domoticz package. We need it only to get compiled libraries and kernel modules available to access the USB>RS485. You can keep the package stopped.
Install kernel modules
Now you have to insert the modules needed for USB access in the NAS kernel.
Logon via SSH to your Synology NAS, with root permission, and paste these commands:
insmod /lib/modules/usbserial.ko
insmod /lib/modules/ftdi_sio.ko
insmod /volume1/\@appstore/domoticz/modules/cp210x.ko
Then connect your USB>RS485 interface to the NAS, launch the ls -l /dev/ttyUSB0 command and verify that /dev/ttyUSB0 appears:

Then write this simple script that loads these kernel modules on boot.
vi /usr/local/etc/rc.d/usbserial.sh
#!/bin/bash
MODULES_UNLOAD="cp210x.ko ftdi_sio.ko usbserial.ko"

start_modules(){
    echo "--- Load modules ---"
    echo "Loading usbserial.ko"
    insmod /lib/modules/usbserial.ko
    echo "Loading ftdi_sio.ko"
    insmod /lib/modules/ftdi_sio.ko
    echo "Loading cp210x.ko"
    insmod /volume1/\@appstore/domoticz/modules/cp210x.ko
}

stop_modules(){
    echo "--- Unload modules ---"
    for i in $MODULES_UNLOAD; do
        echo "Unloading $i"
        rmmod $i
    done
}

case "$1" in
start)
    start_modules
    ;;
stop)
    stop_modules
    ;;
*)
    echo "usage: $0 { start | stop }" >&2
    exit 1
    ;;
esac
If you have trouble using vi, please read this basic guide.
Then give execution permission to the script:
chmod 755 /usr/local/etc/rc.d/usbserial.sh
To check if everything works fine, restart your NAS and check again if /dev/ttyUSB0 appears after boot.
Now the NAS is able to access the tty of the USB>RS485 interface. We do not need this capability, but it’s the only way to run the Docker container without privileged mode (we don’t want the container have full access to NAS resources!).
Create the 123Solar/meterN container
Now that the configuration on the NAS is complete, you can create the Docker container.
Since the Docker web app on the NAS have some limitation (you can’t map the devices, for example), we use a simple command to create the container.
SERVER_PORT=10080 && \
USB_DEVICE=/dev/ttyUSB0
docker create --name 123Solar-meterN \
--restart unless-stopped \
--device=$USB_DEVICE:rwm \
--volume 123solar_config:/var/www/123solar/config \
--volume 123solar_data:/var/www/123solar/data \
--volume metern_config:/var/www/metern/config \
--volume metern_data:/var/www/metern/data \
-p $SERVER_PORT:80 \
edofede/123solar-metern:latest
This command downloads the last version of my Docker image from the repository and create the container, mapping persistent volumes, exposing TCP port and mounting the USB interface inside the container.
Change the firts parameter if you want to use different web port.
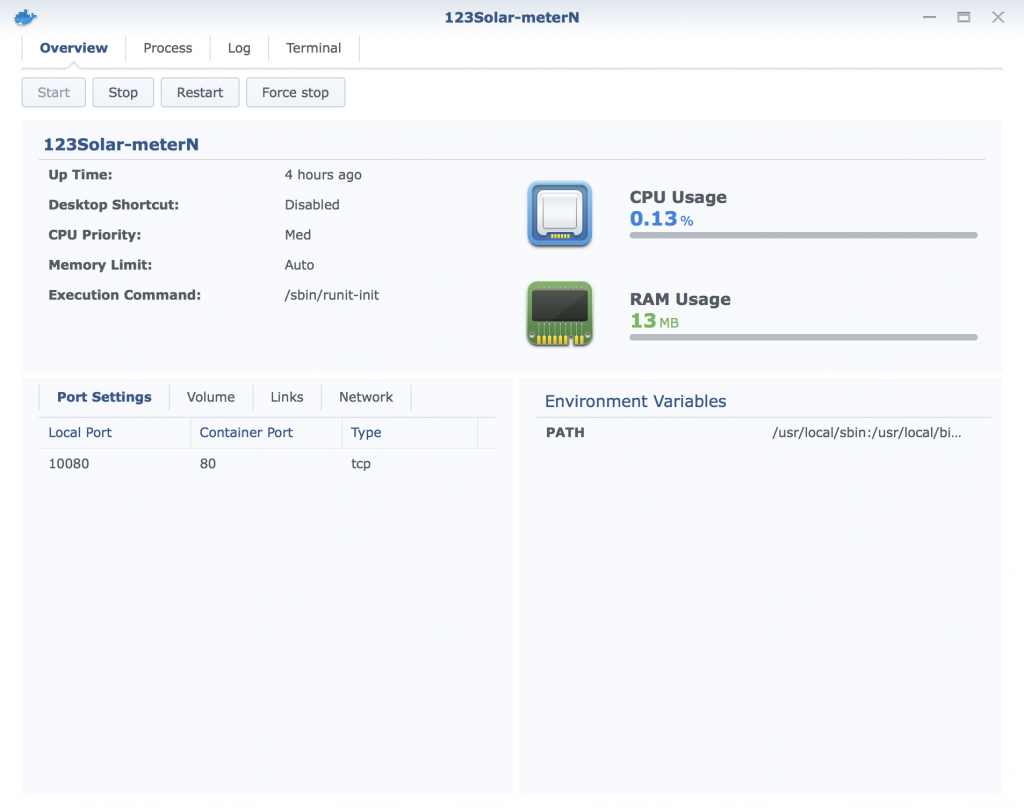
Now you can simply manage the container (start, stop, view status/logs) from Docker web app on the NAS:

First access
The web interfaces are available at these addresses:
http://<Docker host/IP>:<SERVER_PORT>/123solar/
http://<Docker host/IP>:<SERVER_PORT>/metern/
For example (my case):
http://nas.local:10080/123solar/
http://nas.local:10080/metern/
Administrator passwords
The default admin accounts to access the administrator views are: Username: admin Password: admin
You can change the password later by using this command:
docker exec -i -t 123Solar-meterN bash -c 'printf "admin:$(openssl passwd -crypt)\n" > /var/www/123solar/config/.htpasswd && cp /var/www/123solar/config/.htpasswd /var/www/metern/config/.htpasswd'
Updates and rebuild
The container checks and updates 123Solar and meterN automatically during startup (you can see the status on the log).
Since all the configs and datas are stored on persistent named volumes, you can freely delete and recreate the container if needed. All your configurations and datas will be preserved and will come back automatically when you recreate the container.
Please note that every file or modifications outside config and data folders (inside 123solar and metern paths) are not saved on a persistent volume, so it will be lost in case of container recreation.
meterN ModBus setup
I’ve included a config_daemon.php template file (provided by Flavio that points to meter address 2. If your meter address, USB device address or communication speed are different, edit this line:
exec("pooler485 2 9600 /dev/ttyUSB0 > /dev/null 2>/dev/null &");
by using this command while the container is running:
docker exec -i -t 123Solar-meterN nano /var/www/metern/config/config_daemon.php
(and restart the container after editing)
If you have more than one meter on a single RS485 line, you can add the meter IDs, separated by commas, in the config_daemon.php file, as explained by Flavio in his tutorial, for example:
exec('pooler485 1,2,3 9600 /dev/ttyUSB0 > /dev/null 2>/dev/null &');
Container shell access
If you need to edit some file or configuration inside the container, you can simply access the shell using this command while the container is running:
docker exec -i -t 123Solar-meterN bash
Docker image details
The image is based on Alpine linux for lightweight distribution and mainly consist of:
- runit init scheme and service supervision
- Nginx web server
- PHP-FPM FastCGI process manager for PHP interpeter
All components are automatically configured by the Docker image